Monday, May 13, 2013

2D Image Filters with OpenCV

In this blog post I'm giving you an example on how to do basic 2D image filtering using OpenCV and displaying the result instantly using JavaFX.


Image filtering means that you apply various transformations on a given image. Of course, image processing is math, and I'll assume since you stumbled by this blog you are familiar with the basic concepts of image processing - if not there are plenty of articles in the web which can give you a good overview. Wikipedia will always give you a broader view on the topic.

Like you've noticed in the past few posts on this blog I'm making myself familiar with the OpenCV library, and the best way to learn a new API is of course to read whats available and make your own experiments. In my case, I've made a JavaFX application which makes it easy to explore the different effects you can achieve by changing the kernel values and getting instant feedback.

Warning: This blog post is just about very basic filtering, and chances are high that some of the operations deriving from parameterizing the kernels have their own names and/or have more efficient implementations in OpenCV.

As a sidenote, if you don't already know Bret Victors talk on 'inventing on principle' you should definitely visit his web site. I've tried to make the program given below in a way that the user can experiment and maybe get new ideas about the whole problem, invent their own kernel for example. It's fun to change some values here and there ...

Like this you get an idea what's behind words like 'blurring' or 'sharpening', and find out that "finding edges" means nothing more than apply simple yet powerful mathematical operations on an 2D matrix.

I have provided some example kernels along with the application to give you some starting points - but feel free to explore the effects. Check out this page for an explanation of the used kernels in the application.

Another motivation for this blog post is to explore the feasibility of using Scala along with OpenCV and - I'm biased - I find it a very good match. Even more so if you use JavaFX to implement the GUI.

Below is the code, this is all you need for the video above. (yes - I've discovered iMovie! ;-) ).


Sunday, May 5, 2013

Using Scala Futures and OpenCV together with JavaFX

In this post I want to show you how you can improve the performance of your application by using datastructures and approaches which make use of non blocking parallelism.

Girls skipping at an athletics carnival

Recently I digged into the API's of OpenCV, which is a great image processing library. I wrote several blog posts about it, and this is sort of a follow up on these posts. However, this time I want to improve the project by introducing Scala Futures into the codebase. (Why? because its there!)

Scala Futures are an integral part of Scala 2.10 and are explained here in more detail. I want to show you how the readability of applications can benefit - as well as their performance. The latter will be more important for your managers, but using Futures combined with Scala's for comprehension have their own aesthetic appeal.

If you compare the isight-java project from this and this commit, you'll find that not very much changed for the end user, in fact it is more or less the same end user experience. However the version I'm describing here makes heavy use of the 'Futures' concept.

In short, the application is based on a filtering pipeline, starting on the grabbed image several different algorithms are applied to it, passing and mutating the Mat datastructure from one operation to the other.


Using Scala Futures and for comprehension, this translates to a code like this:


You'll recognize the pipeline structure in the code above. The neat thing is that you'll get error handling for free using the recover combinator. If you compare the code above with the one of the previous post, you'll notice that it looks much clearer and the intention of the code is really apparent. (even though IMO the last version wasn't too bad either :))

Of course, the image processing functions needed some adaptions to return futures:

You can see that using futures is quite easy and feels somewhat natural when you combine it with the for comprehensions. For a more detailed discussion on what happens under the covers, please read the article on futures on scala-lang.org.

Disclaimer: I've mixed up some concepts of the Scala libraries and JavaFX parallelism (I'm using JavaFX's  Service and Task concepts along with Scala Futures) - some may argue that this is not necessary or even dangerous. Quoting this guy hereTMTOWTDI. Be aware that mixing different approaches of parallelism can lead to confusion of the poor guy inheriting your code, or may result in unwanted effects (?). One side effect I noted when using Scala Futures was the necessity to use the Platform.runLater( ... ) trick to make sure the image service runs on the gui thread.

Anyway, if you go that road with Scala Futures, with small tweaks to the source code (at least on the surface) you'll get a parallelized version which, when used in conjunction with the for comprehension, looks like a sequential code.

If your result consists of several, independent sub problems which you combine in a final step you'll get the best results when parallelizing your app.

Even if in this application this is not the case, I've nevertheless noticed a considerable improvement in responsiveness and speed (whatever reasons this had: either wishful thinking or just bad implementation beforehand ;-) ) as well as readability of the code.

It could well be that the guys over at the scalaFX camp have done something to use concurrency as convenient as the scala team did for scala futures - if not: this would be a great idea.

me blurred beyond recognition
Check out the full source code for this blog post here.

In the meantime, I wrote a new post about using your webcam with JavaCV, maybe this interests you as well?

Wednesday, May 1, 2013

Use your webcam with JavaFX and OpenCV - Part III

In this blog post I want to show you how you can use your webcam to grab pictures and build a GUI using JavaFX to show the video stream filtered by OpenCV algorithms.

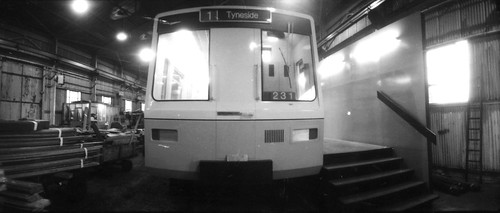
Prototype Metro Cars - Birmingham Factory

Starting with the application I've developed for the last post I've added several new features to it, which I'm going to explain here.

First, I've added two sliders to the application which control the width and height of the image. There are pre - made controls for that (Slider) which are quite easy to use. Combining those with a BorderPane you already get what you need to create functional UI.

On the openCV side, we just need to slice the grabbed Mat data structure with Range objects, and thats it. It is interesting to see the difference in speed (and thus, how fast openCV and your webcam can provide data) when changing the size of the grabbed image.


Here is the source for the application shown above.

Converting an image taken from the webcam  to grayscale using OpenCV and Java


You all know that pictures of yourself look better if you do it in grayscale. This is easy to accomplish using openCV, since there is the very handy Imgproc class which provides several nice static methods like Imgproc.cvtColor(...).

Once again, this method operates on the Mat datastructure:

So far, we've pretty much completed the same like  this introductory tutorial here using JavaFX and Scala. Here is the commit for further reference.

... then some days later ...

I've overhauled the code and made it more interesting also seen from the Scala and the JavaFX point of view. Furthermore I've introduced a feature to blur the captured image as another example for using the OpenCV API using the Java bindings. I tried to group the code in different traits so you can quickly reuse them if you find them useful.

Here is a screenshot of the main program logic which uses all parts:


The following code shows how to create a combobox containing custom objects using the helper functions introduced in the small project:


Using the approach to put everything needed to build a combobox into its own scope makes the code more readable since you don't have to bother with namespace pollution. Speaking of this - on the mailinglist there is also an ongoing discussion to deprecate and then remove the builders for the various visual components. I tend to create helper functions which can be parameterized:


This "mkFoo" approach helps a lot to structure your code.

Finally, you'll get a screencast of the running application showing my desktop while my webcam is filming my TV Set with airplay turned on.


The source code for this little application is available on my github site.